Complete User Guide
Follow this recommended step-by-step workflow to go from account setup to generating professional AI marketing prompts.
Start Generating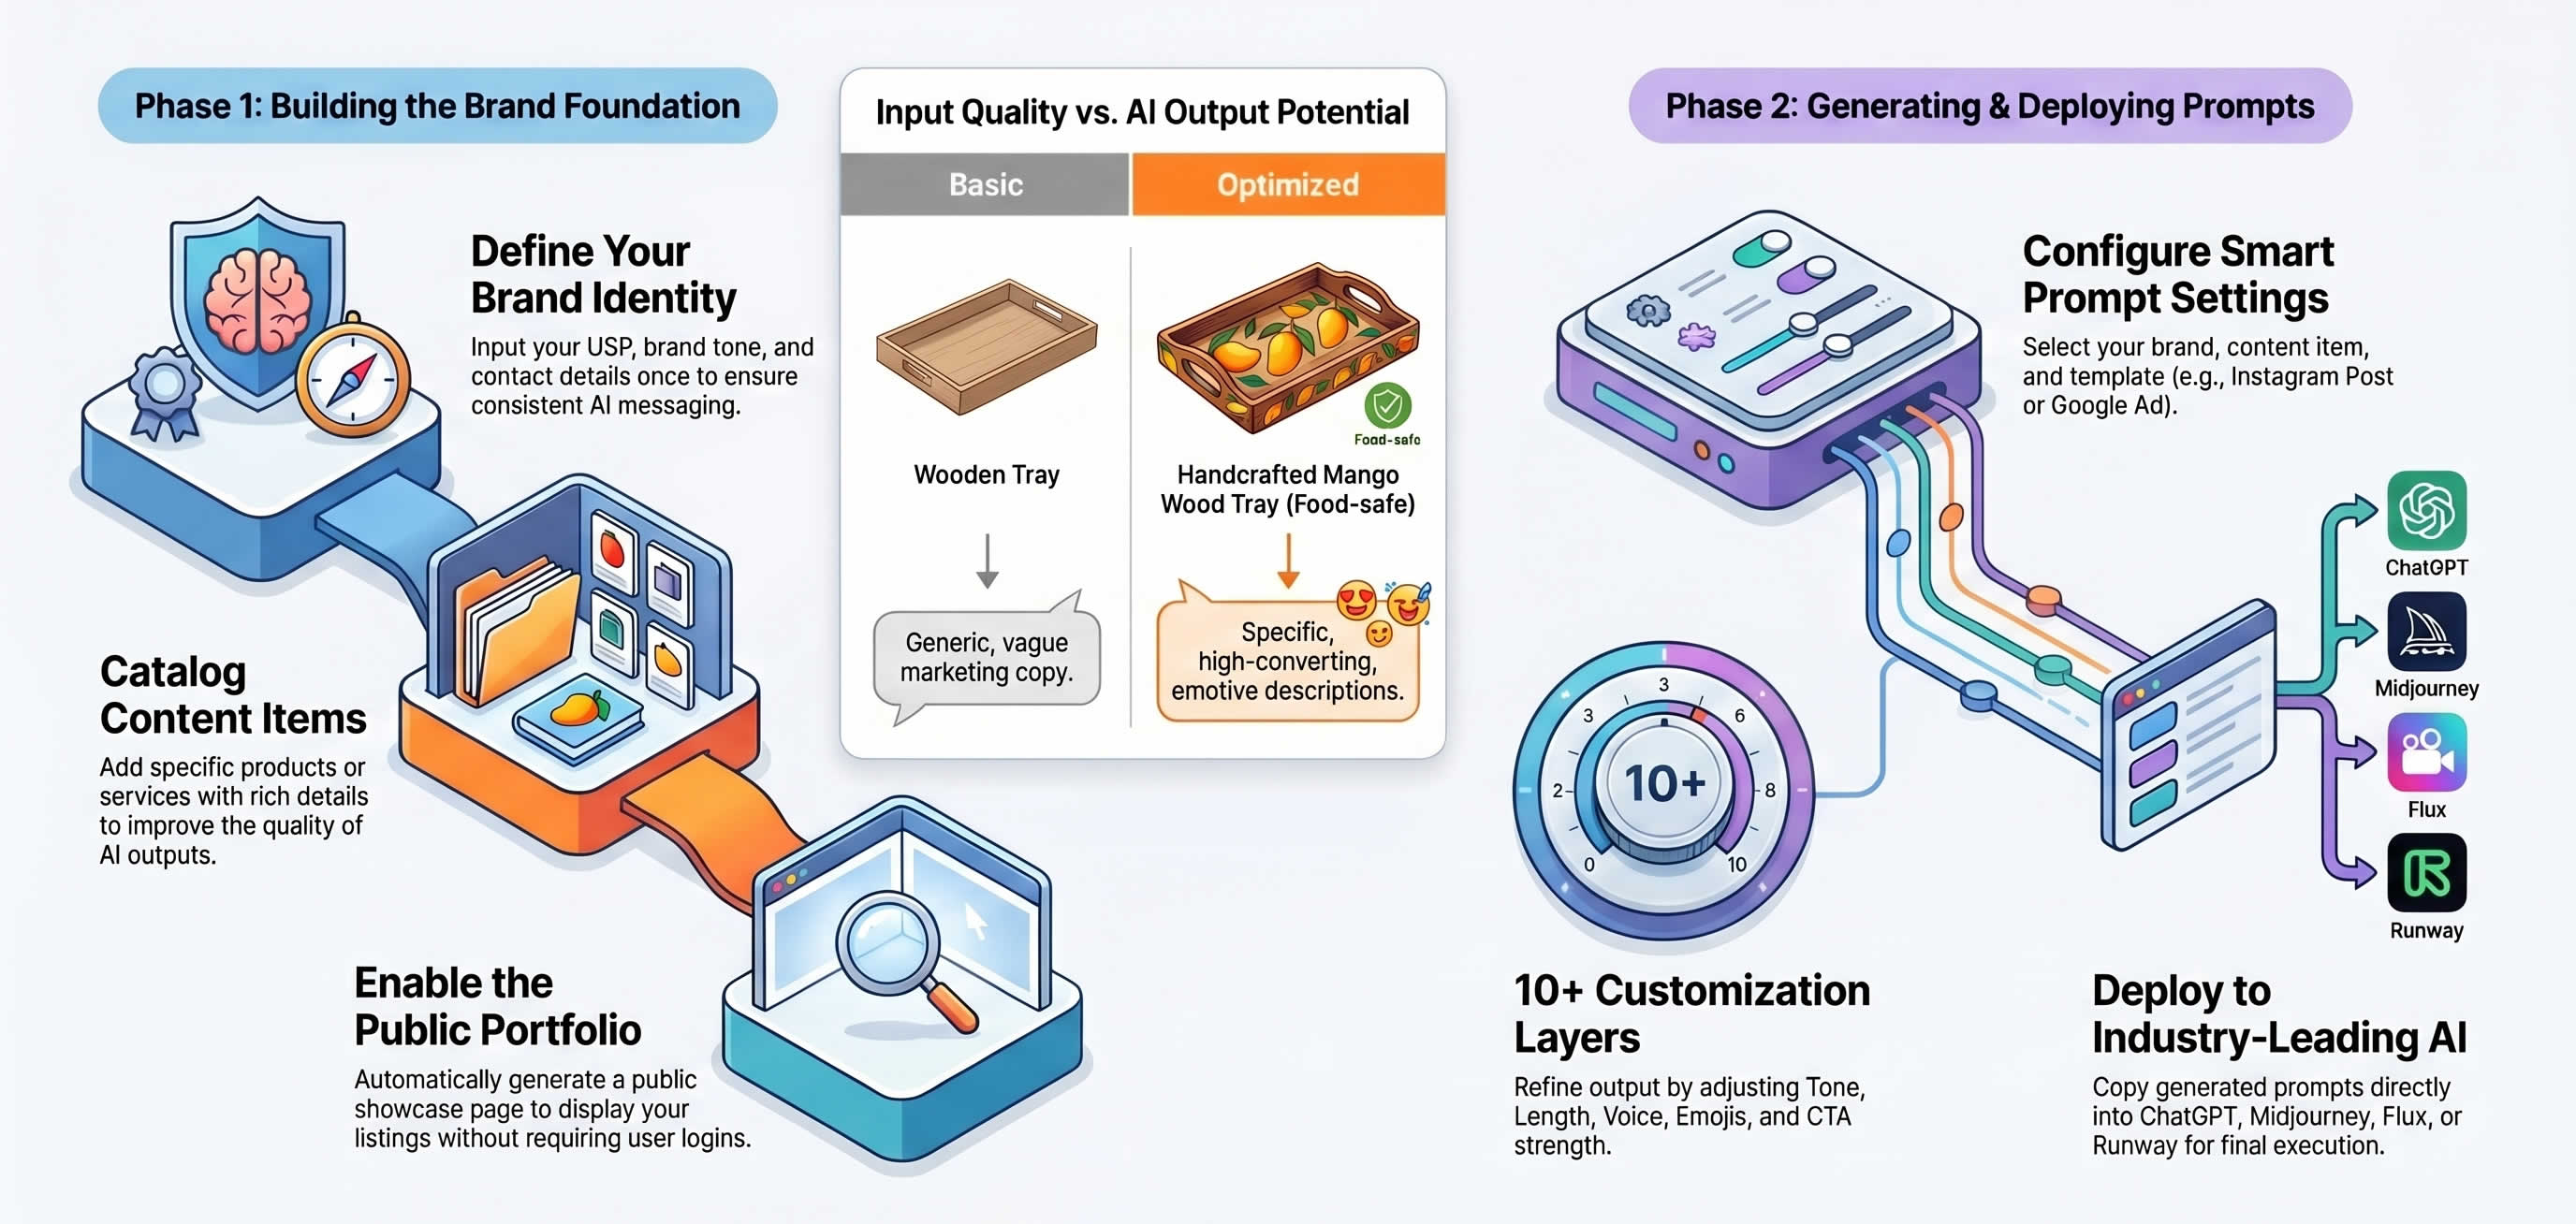
Phase 1: Setup & Initialization
Prepare your workspace and establish your brand identity.
Step 1: Login & Access Workspace
After logging in, you will enter your assigned workspace. A workspace represents your business, brand, agency, or client account.
Step 2: Dashboard Overview
The Dashboard gives you a quick summary of your activity and quick shortcuts to navigate the platform.
Key Metrics
- Content Items: Total products, services, or events added.
- Prompts Generated: Total AI marketing prompts created.
- Active Brands: Available branding profiles.
- Collections: Saved prompt collections.
Quick Actions
- Create Content Item
- Manage Branding Profile
- Generate Prompts
- View Prompt History
Step 3: Create Your Branding Profile
Before creating content, set up your brand information. This allows the AI to generate accurate, brand-aligned marketing content automatically.
Business Information
Brand Name, Company Name, About Business, Founded Year, Business Type.
Contact Information
Contact Person, Phone, WhatsApp, Email, Website.
Social Media Profiles
Facebook, Instagram, LinkedIn, YouTube, Google Business Profile.
Brand Identity & Marketing
Upload Logo & Banner, define Tone, Colors, USP, and CTA.
Phase 2: Core Data & Portfolio
Input your listings to fuel the AI. Optionally, configure a public showcase.
Step 4: Create Content Items (Core)
Add products, services, properties, or events. This is the core data the AI will use to generate marketing content. The more detail you provide, the better the AI output will be.
Data Quality Example
Product: Wooden Tray
Material: Premium Mango Wood
Dimensions: 18 x 12 inches
Features: Food-safe finish, Rustic design, Easy to clean
Step 5: Portfolio Management & Layout (Optional Extra)
As an extra advantage, organize your items into groups and control exactly what visitors see on your public portfolio cards and detail pages.
Portfolio Groups
The system automatically creates a public portfolio page for your brand where visitors can browse your listings without logging in.
Listing Page Fields
Choose what appears on the summary cards.
Detail Page Builder
Use the drag-and-drop builder to create page sections like "Product Information" and "Contact Information".
Phase 3: The Generation Engine
Turn your data into powerful, customized marketing assets.
Step 6: Generate AI Marketing Prompts
This is the core feature of the platform. Navigate to Create Prompts and select your inputs:
Step 7: Configure Output Settings
Customize the behavior and style of the generated prompt.
Step 8: Append Brand Information
Select exactly what brand data AI should automatically include at the end of the prompt (e.g., Company Name, Phone, Website, Instagram, Location, USP, CTA).
Step 9: Generate Prompt
Click the generate button. The system will load your item data, inject your branding, apply the template structure, append your style settings, and generate a final AI-ready prompt instantly.
Phase 4: Campaign Workflow & Automation
Use campaigns when you want to run multiple prompt templates in a planned sequence for the same content item.
Step 10: Create a Campaign
A campaign is a reusable multi-step workflow. Instead of generating one prompt at a time, you define a sequence of templates once and apply it repeatedly to content items of the same content type.
Step 2: Facebook Ad Copy
Step 3: Flyer Prompt
Step 4: WhatsApp Promotion Text
Step 11: Add Ordered Campaign Steps
Each campaign step points to one prompt template. You can choose templates by category, define the order, and build a repeatable prompt production flow for one content type.
Step 12: Configure Step-Level Style Options
Every step can have its own tone, length, output type, format, and appended branding fields. This makes one campaign capable of producing different kinds of marketing assets from the same source item.
Step 13: Run the Campaign for a Content Item
Select a campaign, branding profile, and content item, then run the full sequence. The platform will generate all campaign steps for that item in one structured flow.
Step 14: Review Grouped Results & Download Bundle
Campaign outputs are grouped by campaign and content item. You can review prompts together, copy individual prompts, and download the complete set as a ZIP bundle for handoff or external AI use.
Phase 5: Review & Organize
Use your prompts across AI platforms and save the best performers.
Step 15: Review Generated Prompt
The result screen displays the compiled prompt, any optional image references (Product, Logo, or Style URLs), and a summary of the generation settings used.
Step 16: Copy & Use Prompt
Click Copy to Clipboard and paste the text into your preferred AI tool.
Step 17: Prompt History
Review all previously generated prompts from the History page. You can search, filter by category/brand/date, and leave 👍/👎 feedback to identify high-performing templates.
Step 18: Save to Collections
Collections help you organize successful prompts for future campaigns.
Phase 6: Omnichannel WhatsApp & Social AI Chatbot
Turn your website, WhatsApp, and Instagram channels into 24/7 autonomous inquiry engines.
Step 19: Connect Meta & WhatsApp Cloud API
Navigate to Chatbot Settings to connect your official WhatsApp Business Cloud API number, Instagram account, and Facebook Messenger page. You can also grab the embed script to add a floating chat widget to your website.
Step 20: Knowledge Base Grounding & Auto-Reply
Your chatbot is automatically trained on your Branding Profile, business FAQs, and Content Items catalog. When prospects ask about pricing, property specs, or service options, the AI delivers instant, accurate answers without hallucinations.
Step 21: Live Human Handover & Analytics
Monitor active conversations in real-time from the Conversations & Chatbot Inbox. A human agent can take over any chat with one click, while Chatbot Analytics track user intent, peak chat times, and lead conversion rates.
Phase 7: Dynamic Forms & Smart Appointment Booking
Capture leads from external sites with AI analysis and instant calendar booking.
Step 22: Create & Embed Lead Forms
Use the Form Builder to create tailored forms with custom fields (text, email, dropdowns, checkboxes). Copy the single-line JavaScript snippet to embed your form on WordPress, Webflow, Shopify, or any HTML website.
Step 23: AI Lead Analysis & Intent Scoring
Enable AI Analysis on your forms. The system evaluates every submission, assigning a buying readiness score, sentiment analysis, and executive summary so your sales team knows which leads to contact first.
Step 24: Smart Appointment Scheduling
Turn your form into a booking engine. Configure consultation types (e.g. 1-on-1 Consultation, Property Viewing, Product Demo), duration, and date/time pickers. Leads automatically populate your Bookings & Appointments calendar with follow-up task tracking.
Phase 8: Social Media Calendar & Publishing
Turn AI-generated content into an organized, scheduled multi-channel social presence.
Step 25: Visual Marketing Calendar
Open the Social Calendar to see your scheduled marketing campaigns across weekly and monthly views. Drag and drop posts to balance content distribution across platforms.
Step 26: Queue & Multi-Platform Auto-Publish
Schedule posts directly to connected social accounts. The automated queue publishes your captions, media, and hashtags at scheduled times with full status tracking.
Phase 9: Integrated Invoicing & Estimates
Monetize your workflow with customized, professional invoices tied directly to your clients.
Step 27: Create Branded Invoices & Quotes
Head to Invoices to create itemized bills or quotes. Invoices automatically inherit your Branding Profile colors, logo, and contact info, with custom tax rates, discounts, and payment terms.
Step 28: PDF Generation & Payment Tracking
Export print-ready PDF invoices or share direct payment links. Monitor payment statuses (Draft, Sent, Paid, Overdue) in real time to keep your cash flow predictable.
Recommended Daily Workflow
This flow ensures your business data is entered only once and reused effectively across AI-generated ads, social content, and image prompts. You can also use it to power an optional public portfolio.